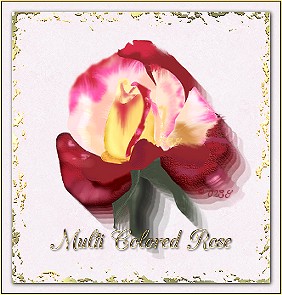
Your rose could be painted any color, but to get the exact same results, I suggest following the color scheme I present.
I created this tutorial as one image, no selections, nor vectors with this one. If you follow my directions and images, you should not have difficulty with it. Its not all that hard to create.
Lets Begin:
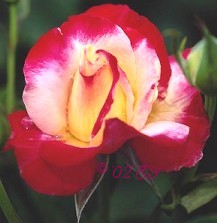
Open the image you unzipped, which is the Rose. Hold your shift key, hit your D key and duplicate your image, close the original as you may want to create more roses. Turn off all the layers, except the bottom layer, stem, make sure your on this layer. Change your foreground to black. Your lighting on this flower is coming from the left. 1st, and for each layer, select all, select float, select defloat. Add a new layer. Take your paint brush, change the shape to square, size 17, hardness 0, opacity 100, step 25, density 100. Draw a line of black along the right edge of the stem. Effects, blur, gaussian blur, 3.00. apply. Merge these two layers visable. Take your retouch tool, on the second tab, change the mode to lighten rgb. On the first tab change the shape to round, size 17, hardness 0, opacity 12, step 1, density 100. Highlight the left side of the stem, go over it a few times. select none. Now do keep in mind, you do not have to keep the stem. You may not want a stem or you might want a longer stem in your paintings. Its purpose is to show you how the original stem looks. On to the next layer.
Open the next layer above this layer. Which is baseleaf1. Select it as I explained on the stem. Do not add a layer. Take the retouch tool, same settings and edge the leaf with the lightener. Go over the edge several times. Effects, noise add, noise 8% uniform. Take your retouch tool, change the second tab to smudge. Click on brush types, which is the image of the brush to the right. A scroll will appear, click custom. Select 24, which looks like tiny specks. Change the step to 1. Starting at the center, smudge in all 4 directions. Select none. Next layer.
Open baseleaf2 and apply the same effects as for baseleaf 1. On to the next layer.
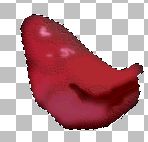
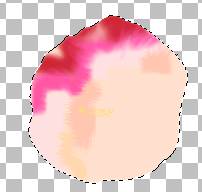
Open petal1. Select it. Effects, Texture effects, fine leather. Change the settings as follows and apply.
 Add a new layer. Open MCRcolors.jpg. If you haven't already. Select color #4. Take your paint brush, and following the diagram below, apply the color, This color is more in the center. Then select color 9, and place along the bottom, then color 6 which is a bright pink, change your brush size to 3, and apply the small dots. Effects, blur, gaussian blur, same settings. Merge visable this layer by turning off the other layers as you have done them. Then take the retouch tool, RGB Darken this time, change the settings to round, size 13, hardness 0, opacity 39, step 12, and density 100. Following the image I show here, darken your petal.
Next layer, petal2. Apply the same effects as petal 1. The colors used are #4 and #9. Use a brush size of 7. You do not apply the rgbdarken. Merge visable and turn off the layer. All your layers should be turned off.
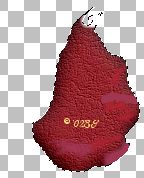
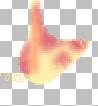
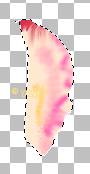
Open petal4. petal 3 is just a base, and has no added effects. Select petal 4. Add a layer. Get your paint brush same settings but increase the size of the brush to 17. Take color #1, and following the diagram place the paint on the petal. Then take color 3, and add the paint, then color 8, then color 6, then color 4 and paint the rest of the top. Take your smudge tool, same settings and following the diagram smudge the colors. On the retouch tool, second tab, find soften. Change your settings to round size 33, hardness 0, opacity 70, step 22, density 100, soften the smudging. Then select none and soften the upper edge of the petal. Merge visable and turn off the layer.
Open petal5. Select it, add a layer. Following the diagram, and using color 8, paint along the upper right of the petal. Then change your color to 6, then color 9 paint the petal. Smudge the paint, then soften the paint. Merge visable and turn off the layer.

Open petal6. Select it, add a layer, with your paint brush, size 7, color 5, paint the dot on the image below, gaussian blur 3.00. Merge the layer, and turn off the layer.
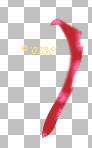
Open petal7. Zoom in once. Select the petal, add a layer and taking color 9, paint a line along the left side. Effects, gaussian blur, radius 2.00. Apply. Merge the layers, turn off the layer.
Open petal 8. Select it, add a layer. With color 2, paint the dots with the same brush size. Then take color 3, and paint a line along the left side but in slightly. Follow the diagram. Effects, blur same settings. Merge then turn off the layer.
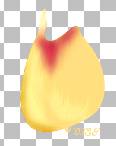
Open petal9. Select it, add a new layer. Take paint color 4 and paint the color along the top and slightly down the center into a v shape. Take the smudge tool, and smudge straight down and back up..keeping color along the top edge. Then soften it. Merge the two layers, then take the rgblighten and draw two curves following the base of the petal and the v. Take the smudge tool, do not go close to the edge, and smudge the lightened yellow up. Soften.Then lighten the top left tip. Add a new layer. With color 7, add color along the bottom left curve. Then gaussian blur it. Merge the two layers and turn the layers off.
Open petal10. Select it and add a new layer. Take color 7 and with the paint brush at size 11, paint along the curve to the right, then change to color 3, and paint at the bottom. Blur. Just touch it with the smudge once on both colors, then merge the layers. Take the retouch tool, lightenrgb and lighten along the upper inner curve. Select none and turn the layer off.

Open petal11. Select it. Select color 6, and add dots of color as shown. Blur it then smudge just once straight up, merge the layer and turn it off.
Believe me, we are getting there, almost done. Open petal12. Select it. Add a layer, and using color 2, and changing the brush size to 17, and this time only, the opacity down to 50, paint a slightly curved line going straight up. Turn the opacity on your paint brush back to 100. Selecting color 4, paint the upper tip. Then take color 6, reduce your brush size to 7 and paint a squiggly line along the right curve, then take color 5, and paint another squiggly line in the center but to the left. Then take your smudge tool and smudge the colors. Then soften your smudging. Merge, then turn off the layer.
Open petal13. Select it, then select color 7, but going to the color palette, darken the color some. Add the layer, and paint along the inner curve. Smudge then soften. Merge, then turn off the layer.
Open petal15. Take color 6,Increase your brush size to 17 and edge some of the petal, then take color 8, and following your edged color paint more inside the petal, then take color 7 and follow the same. Smudge then soften. Merge then turn off.

Open petal 16. Select it, add a new layer, paint the top tip with color 6, smudge and soften, merge. Take the lightenrgb and run it along the right outer edge.
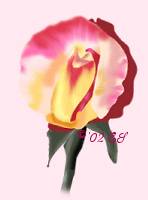
Now open all your layers. Duplicate the image by holding the shift key and hitting the D key.
You can now create other roses just by deleting some of the larger petals and moving the petals around or as in the rose bud, save the center and add a few new petals. Save your rose as a tube. I will be creating new tutorials using this rose..
Home
Mail
|
 Graphics By Evening Star
I create graphics and tutorials for the pure enjoyment of designing and making graphics, tutorials and background sets. All of the work you view was created soley by Evening Star and staff.
This Tutorial may not be downloaded for any purpose other than to create. This Tutorial may NOT be copied in part or whole. It is registered and copywrited to Graphics By Evening Star.
This Page was created entirely by Evening Star and staff.
©Monday, December 02, 2002

All Rights Reserved.
|